Ashby Assessments Integration
Connect Aptora to Ashby to send technical assessments and view results directly in your ATS.
Aptora integrates with Ashby so you can send technical assessments to candidates and view results without leaving your ATS.
This guide walks through connecting the two platforms, sending an assessment, and viewing results.
Connect Ashby to Aptora
1. Create an API key in Ashby
In Ashby, go to Admin > Integrations > Integrations and search for Aptora (or go directly to the Ashby integrations marketplace).
Create and copy an Ashby API Key. Leave the Aptora integration sidebar open in Ashby, and navigate to the Aptora application in a separate tab.
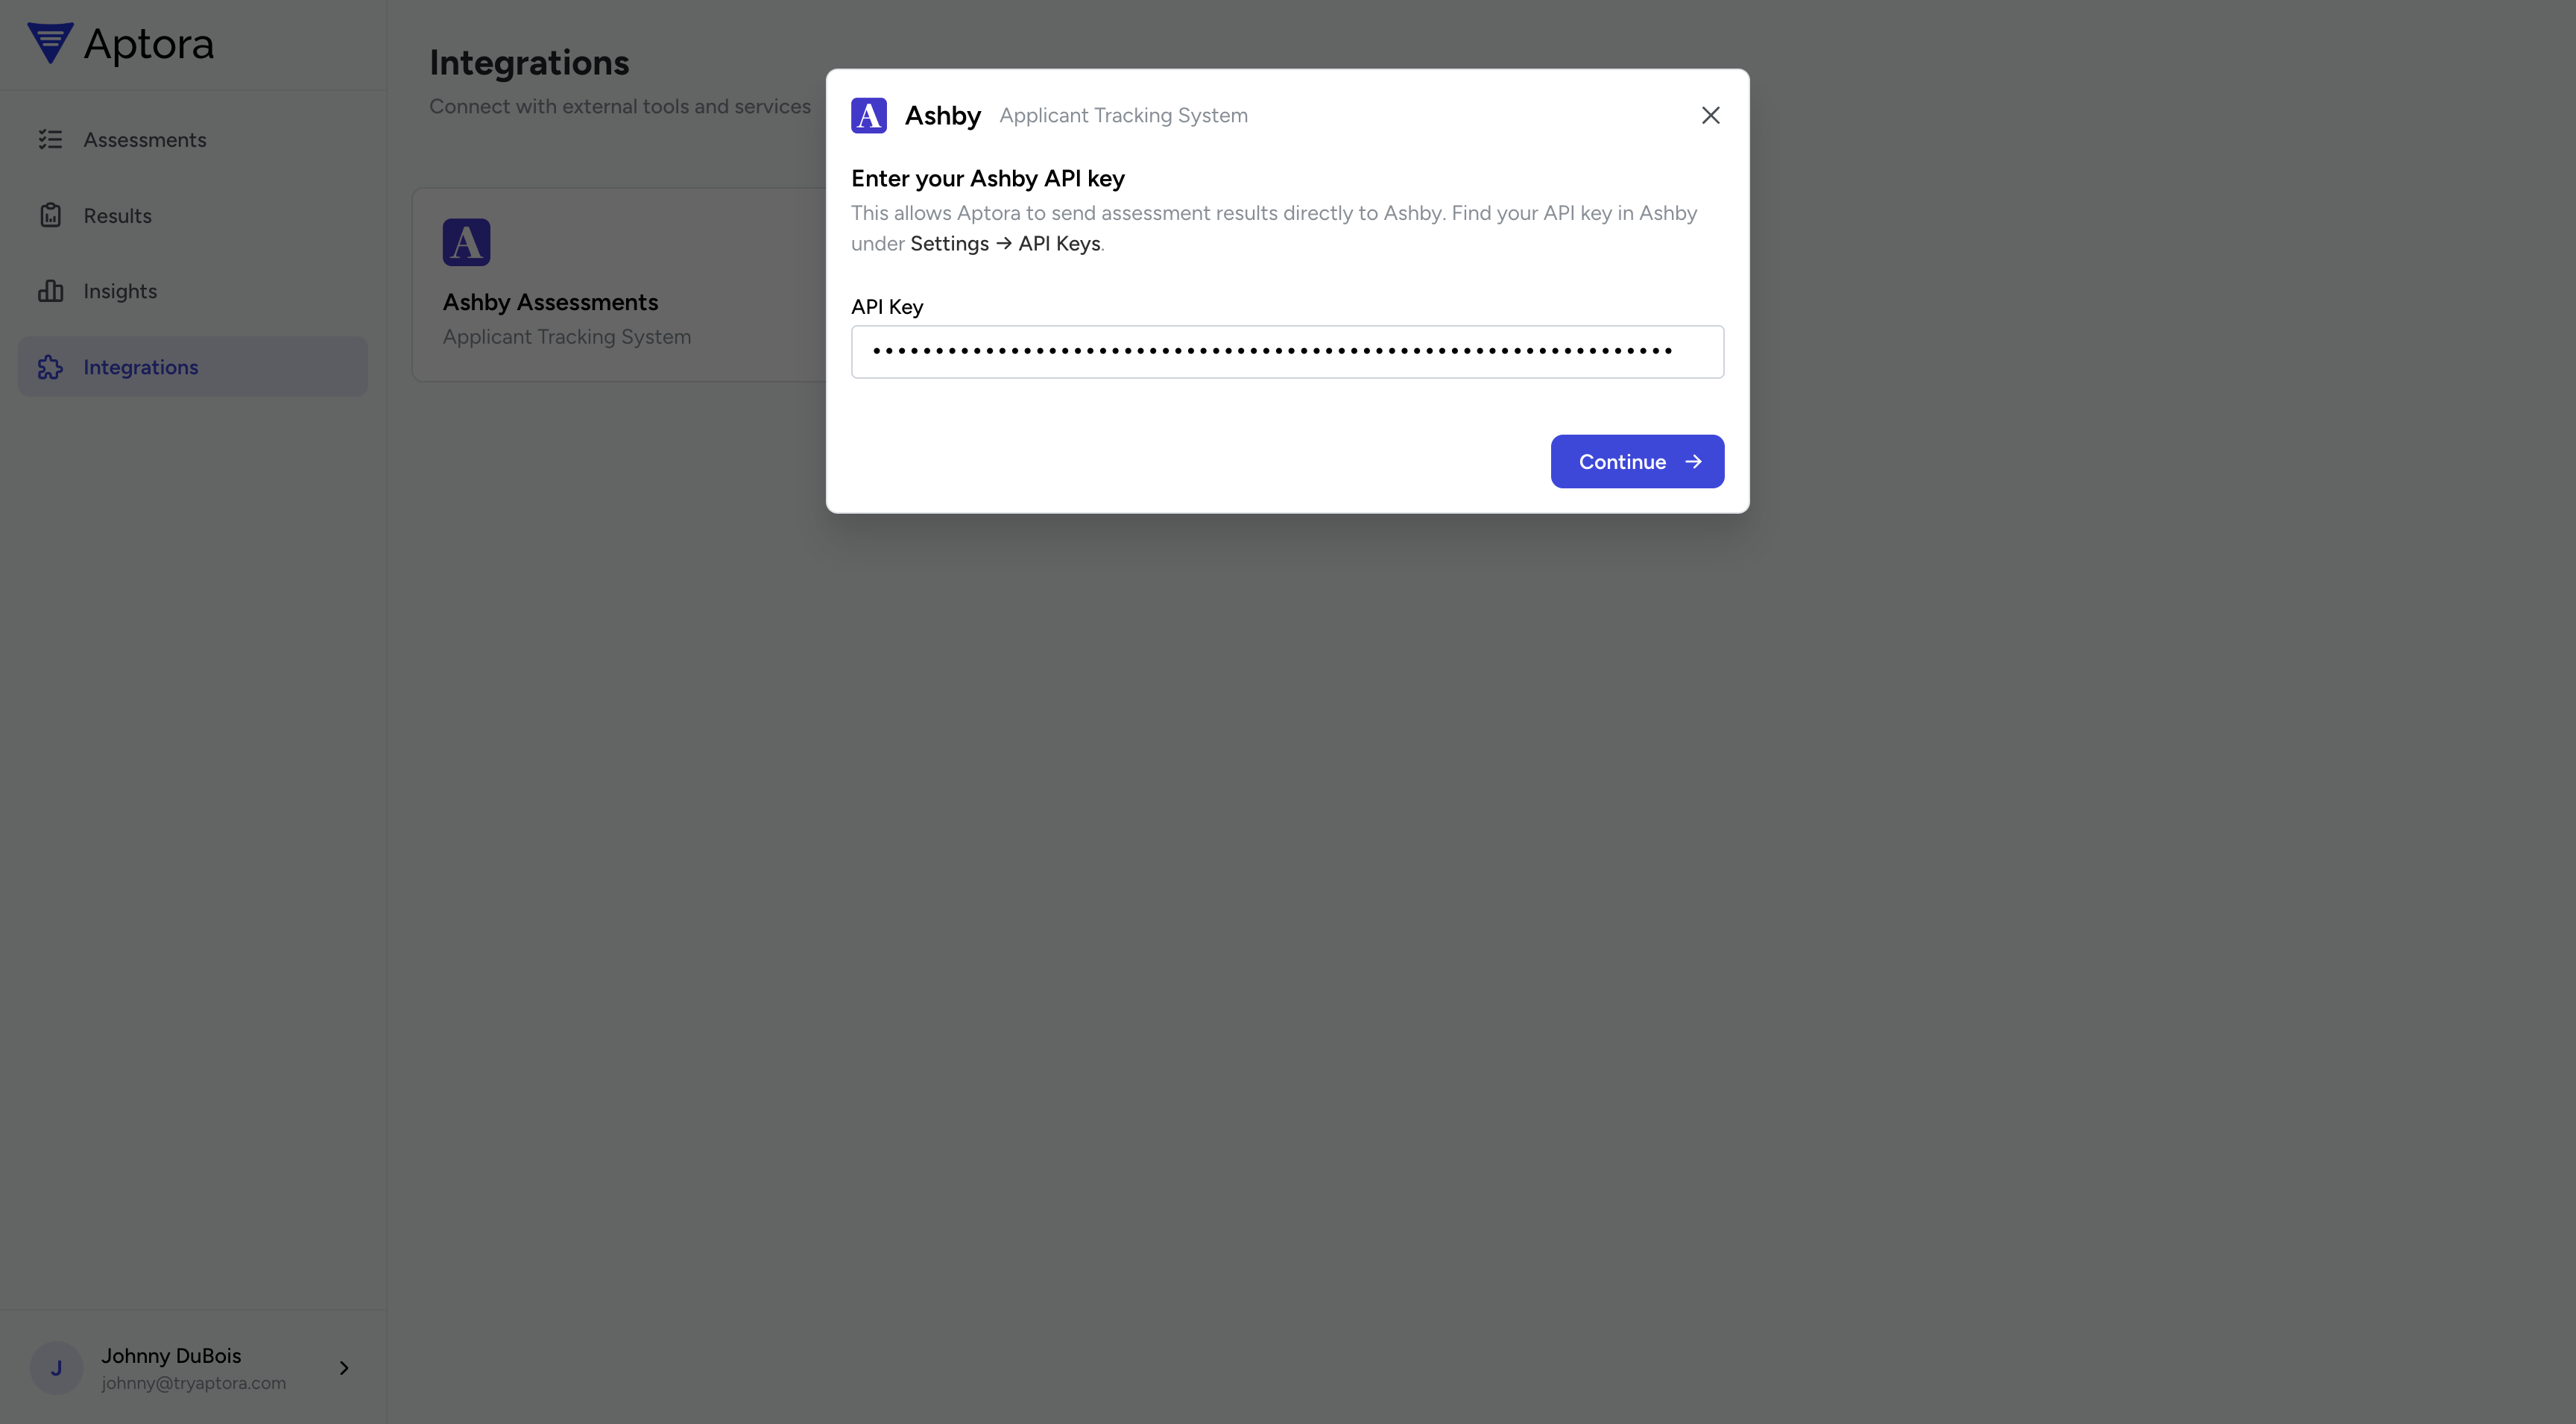
2. Add the Ashby key in Aptora
In Aptora, navigate to Integrations and click Ashby Assessments. Paste the Ashby API key you just copied and click Continue.
3. Copy the Aptora API key back to Ashby
If you’ve already set up an Aptora API key, you can select it here. If not, click continue and Aptora will generate an API key for you. This key is only shown once — make sure to copy it before clicking “Continue”.
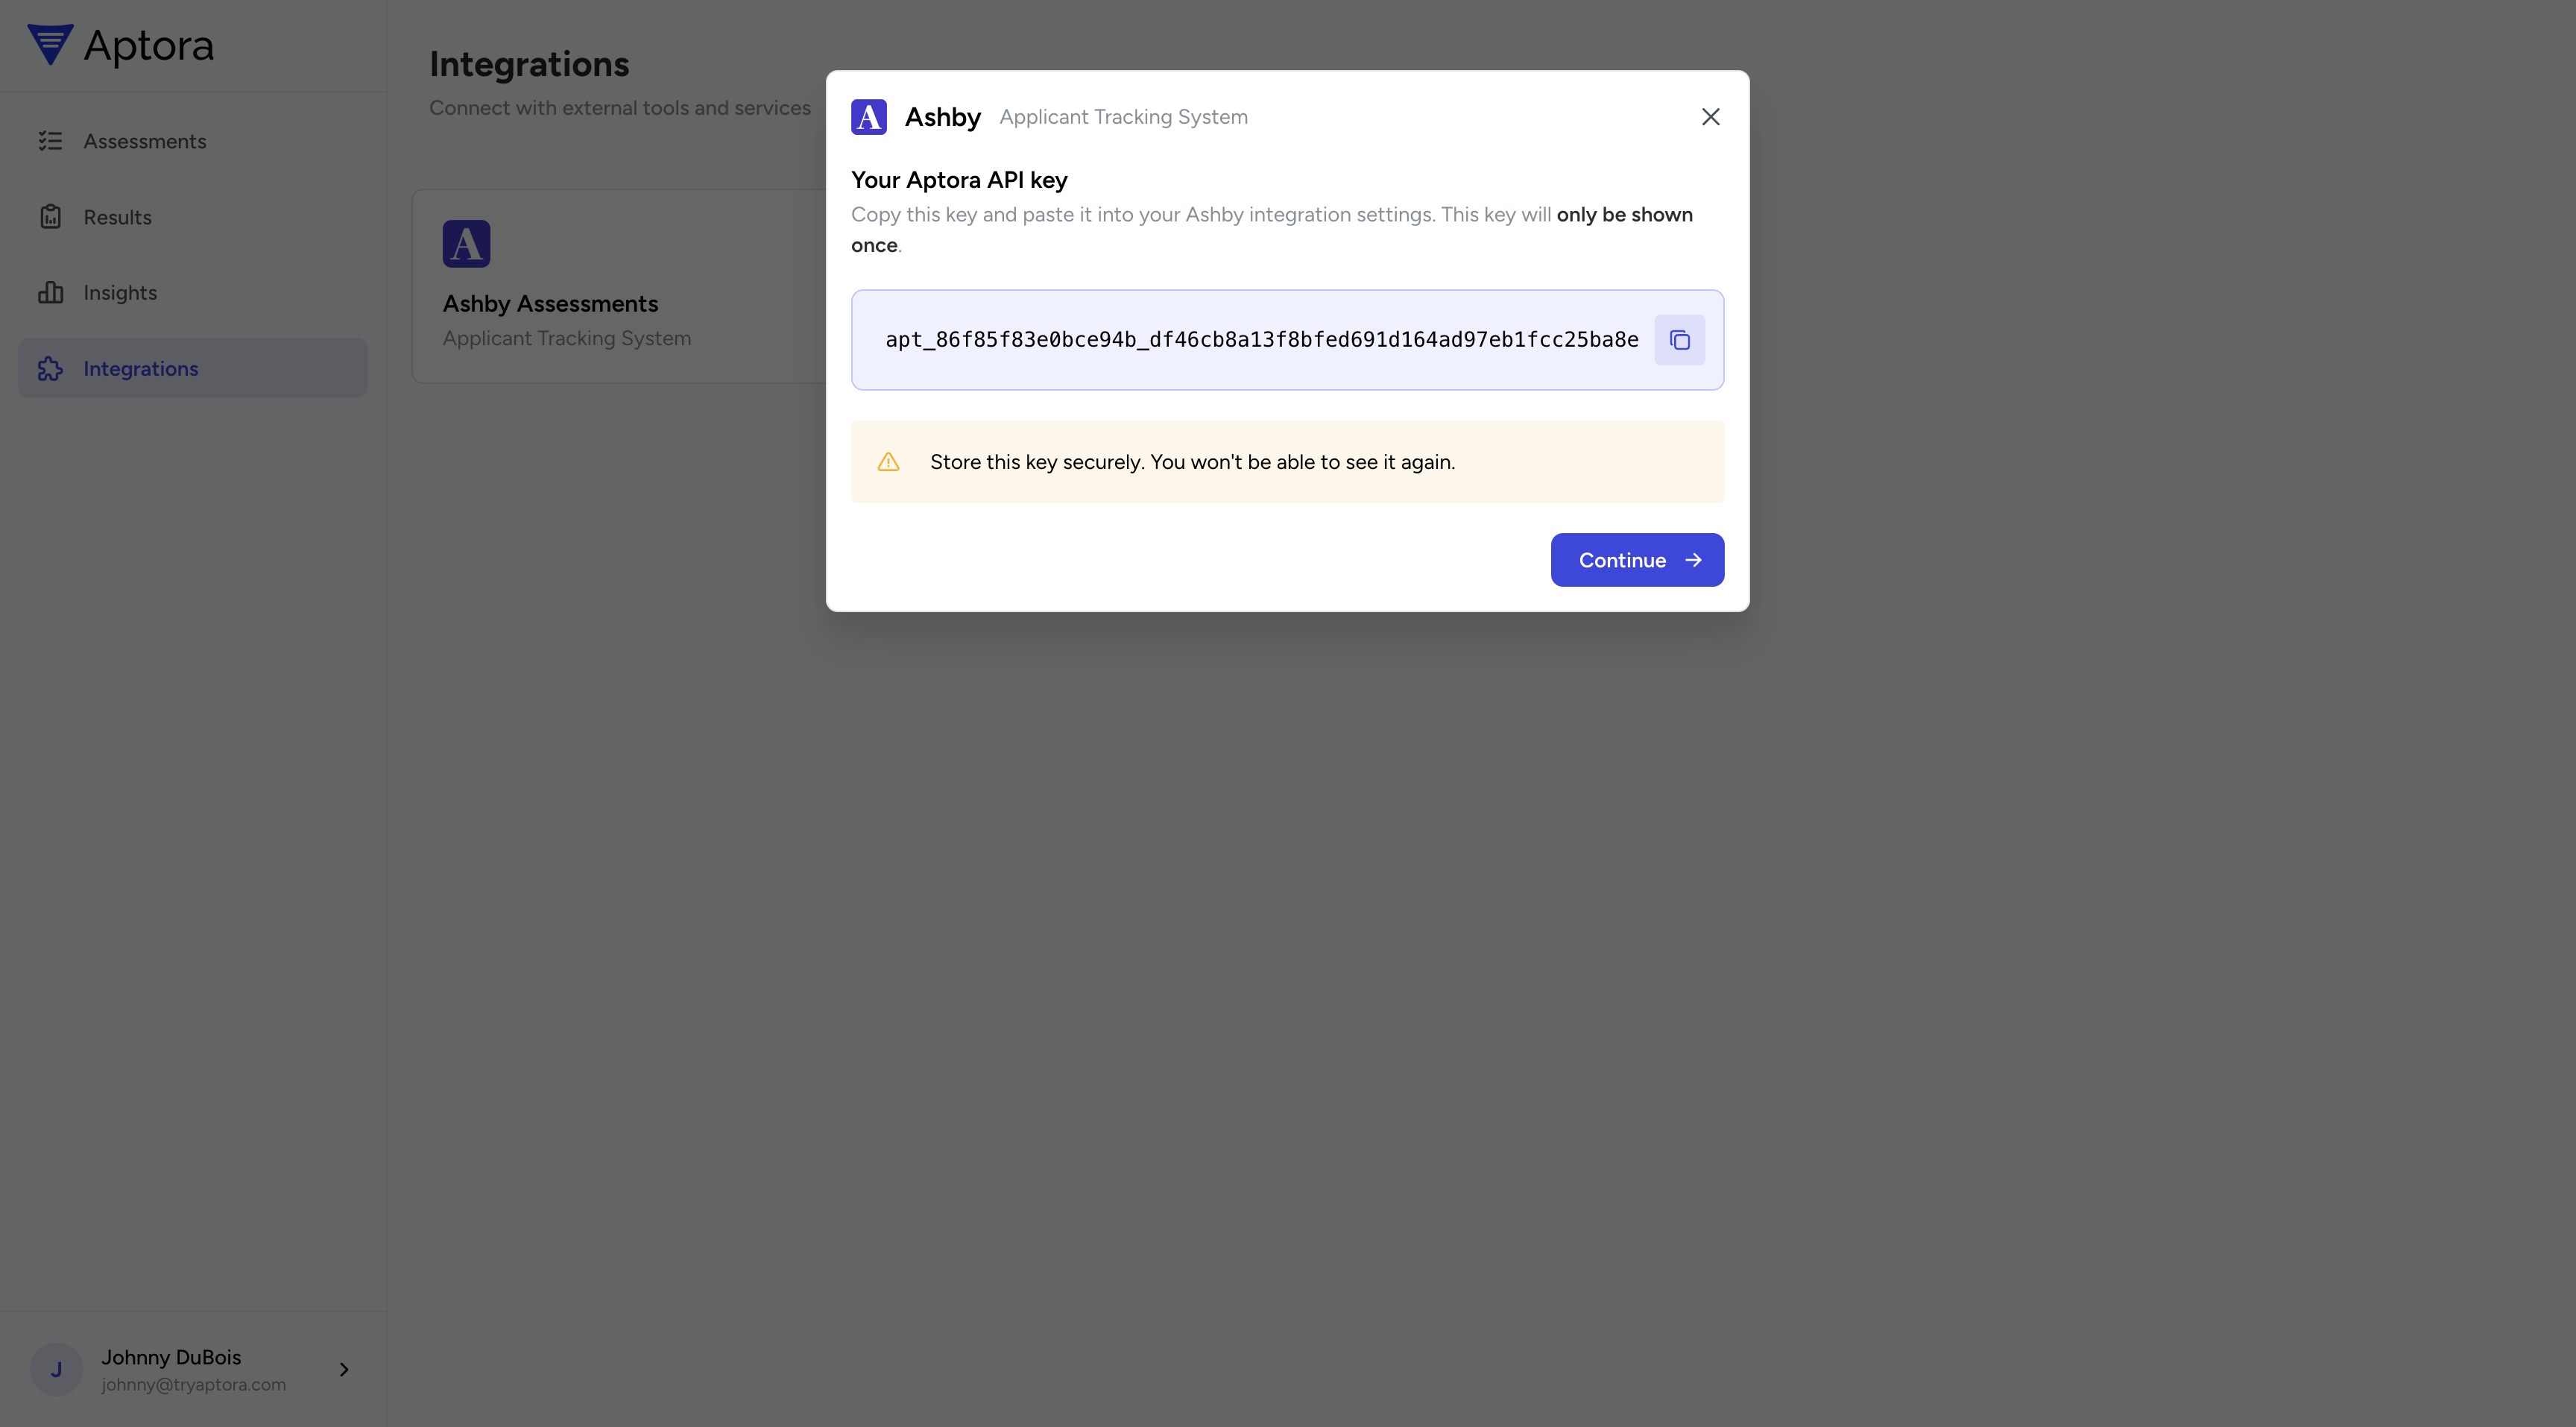
Back in Ashby, paste this key into the Aptora API Key field in the integration settings and save.
Sending an Assessment
Navigate to a candidate in your Ashby pipeline. Click + New Activity and select Assessment from the dropdown.
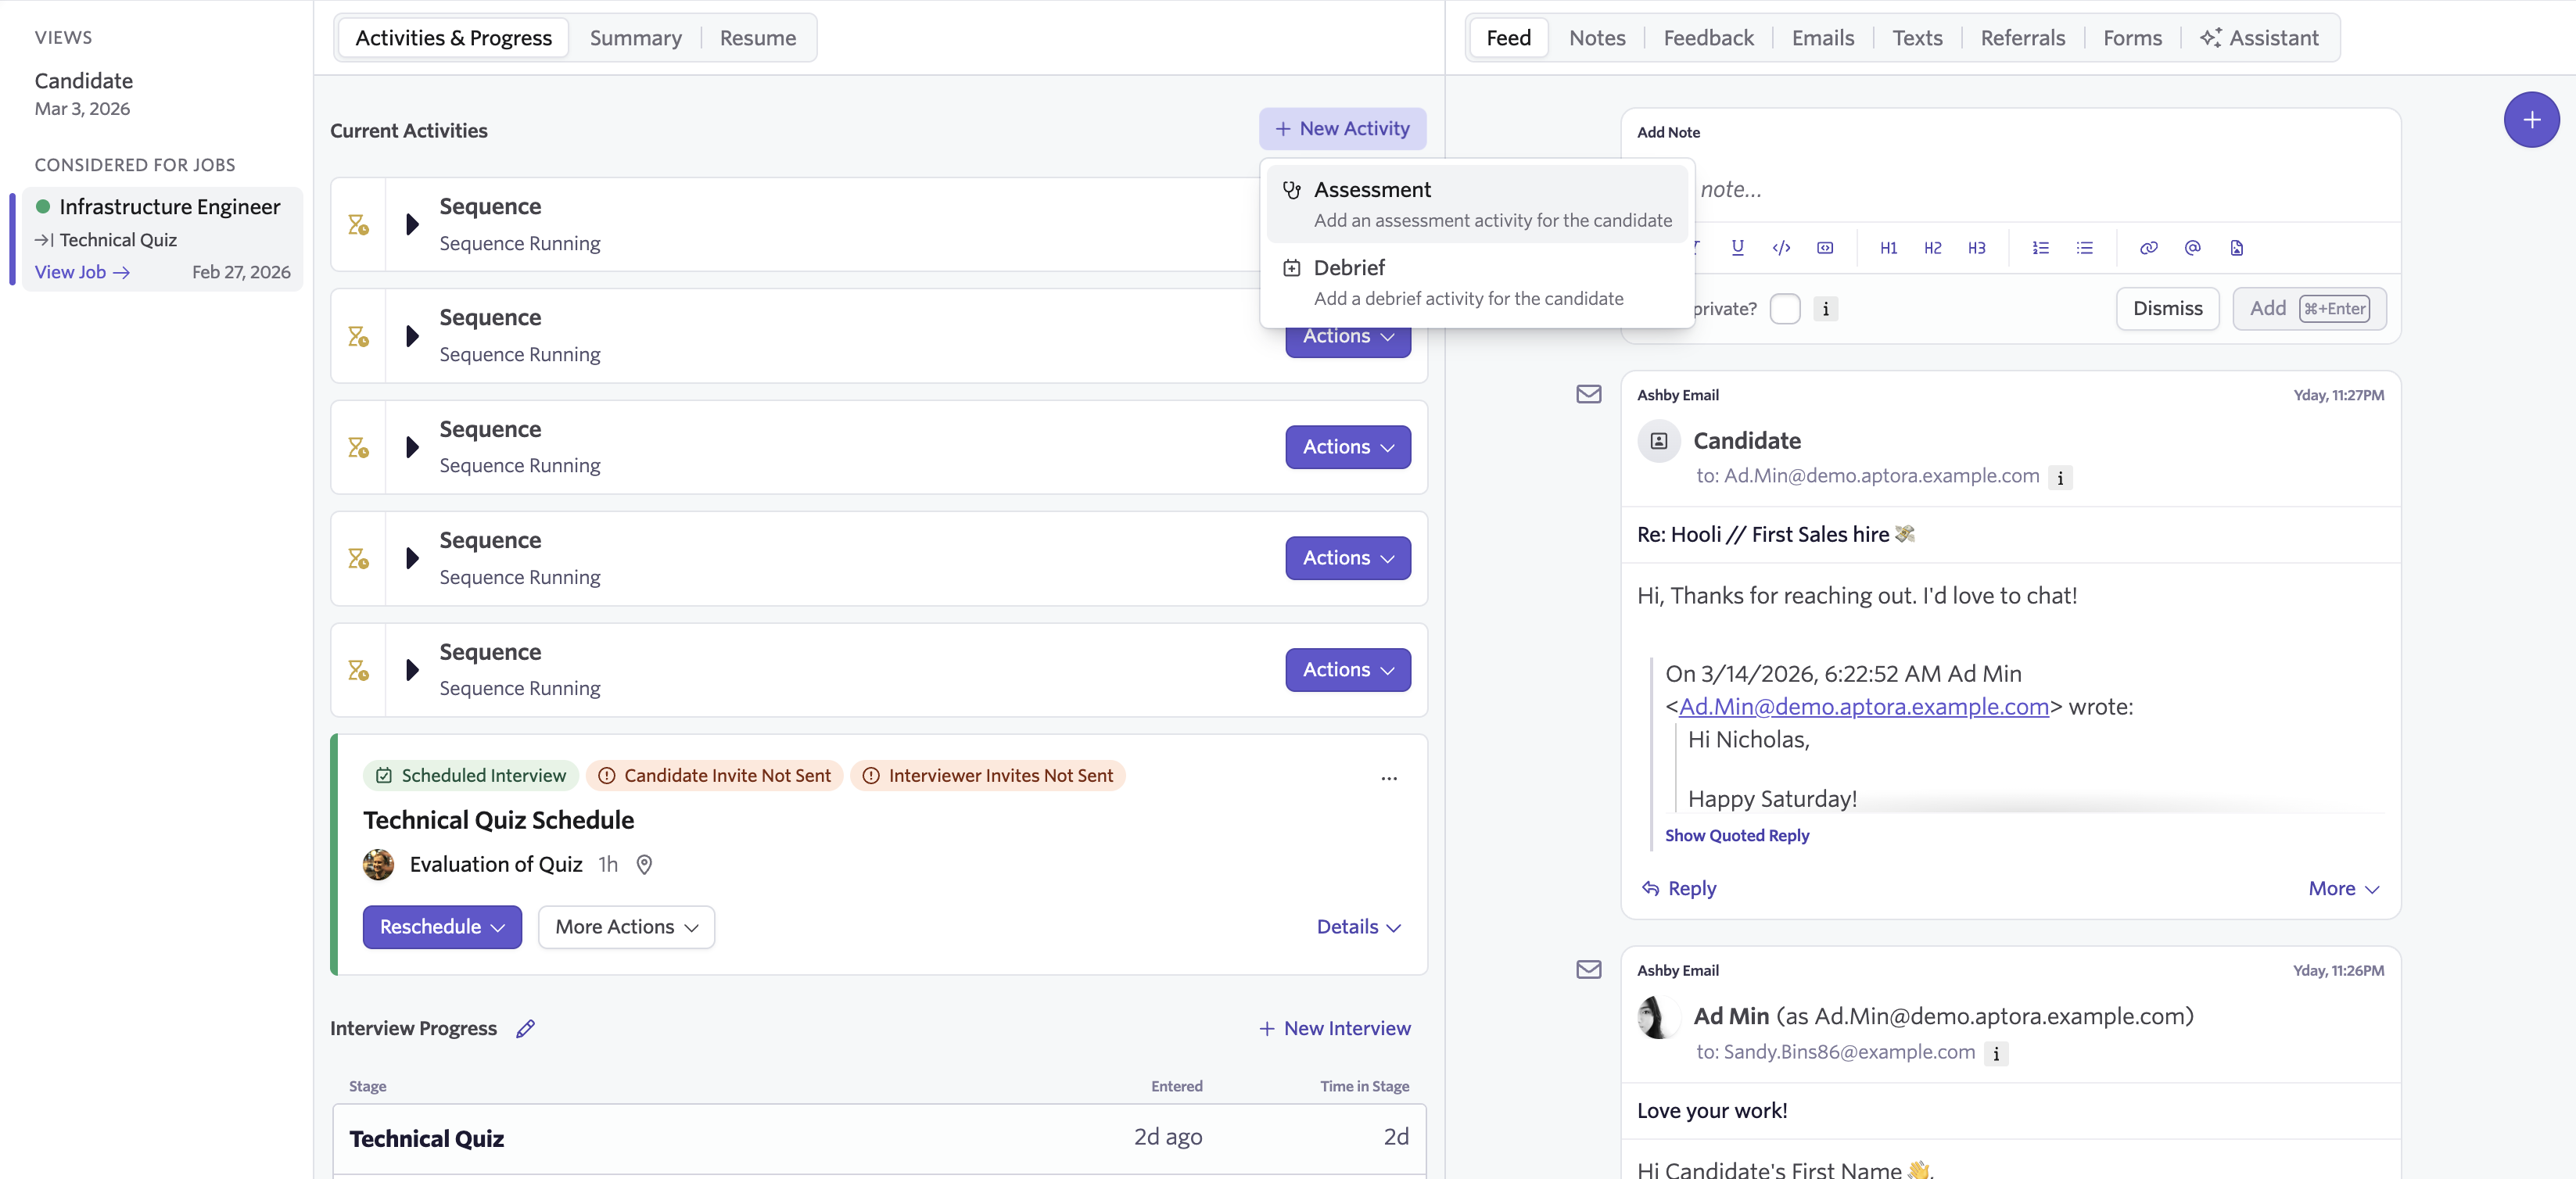
Choose Aptora as the assessment provider, select the assessment you’d like to send, and click Start on the assessment that appears in the candidate’s activity list.
The candidate will receive an email with a link to complete the assessment.
Viewing Results
Once the candidate completes the assessment and it has been graded, results are automatically pushed back to Ashby. You’ll see the status, recommendation, score, and the date the assessment was sent.
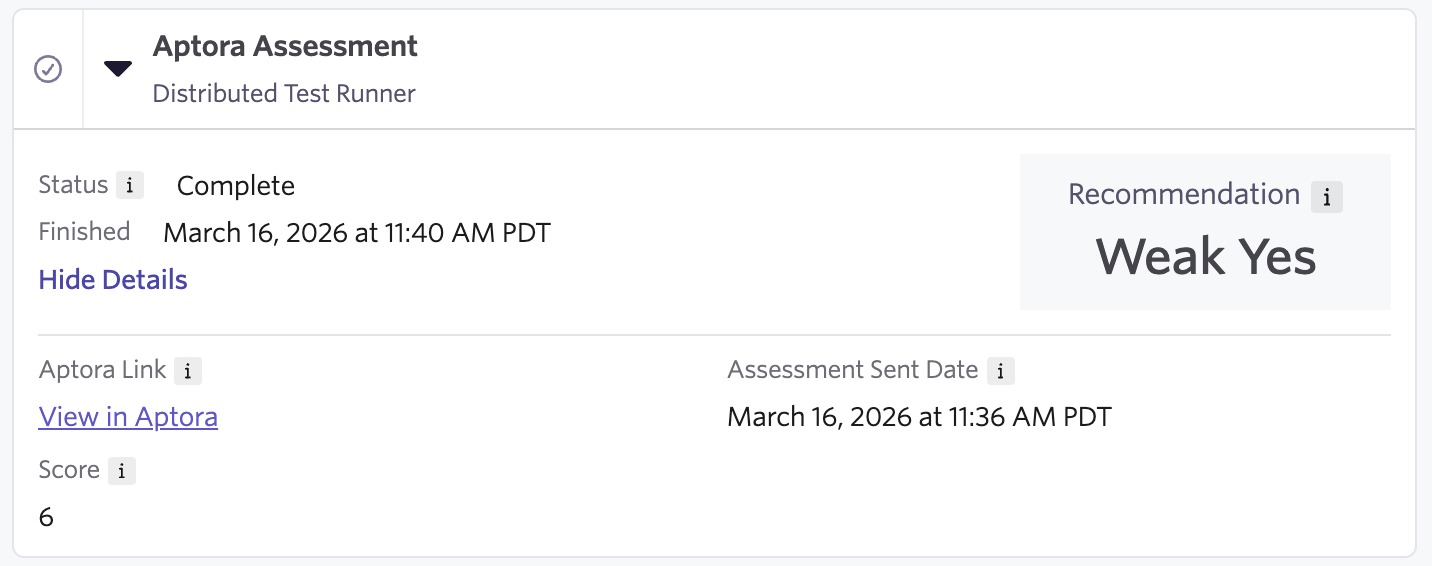
Click View in Aptora for the full detailed results, including the candidate’s responses and per-question breakdown.
Support
If you run into any issues setting up the integration, reach out to johnny@tryaptora.com.